Editing a Screencast in Gimp
Editing Screencast
In this older post I described how to record a screencast in Linux.
However, you will very likely need to do some post processing with the recording, like removing the unneeded parts at the beginnig or the end, cropping the image or adding an empty frame at the end so it is obvious when the animation restarts.
And for that we can use Gimp editor which is usually pre-installed in the major Linux distributions.
Gimp
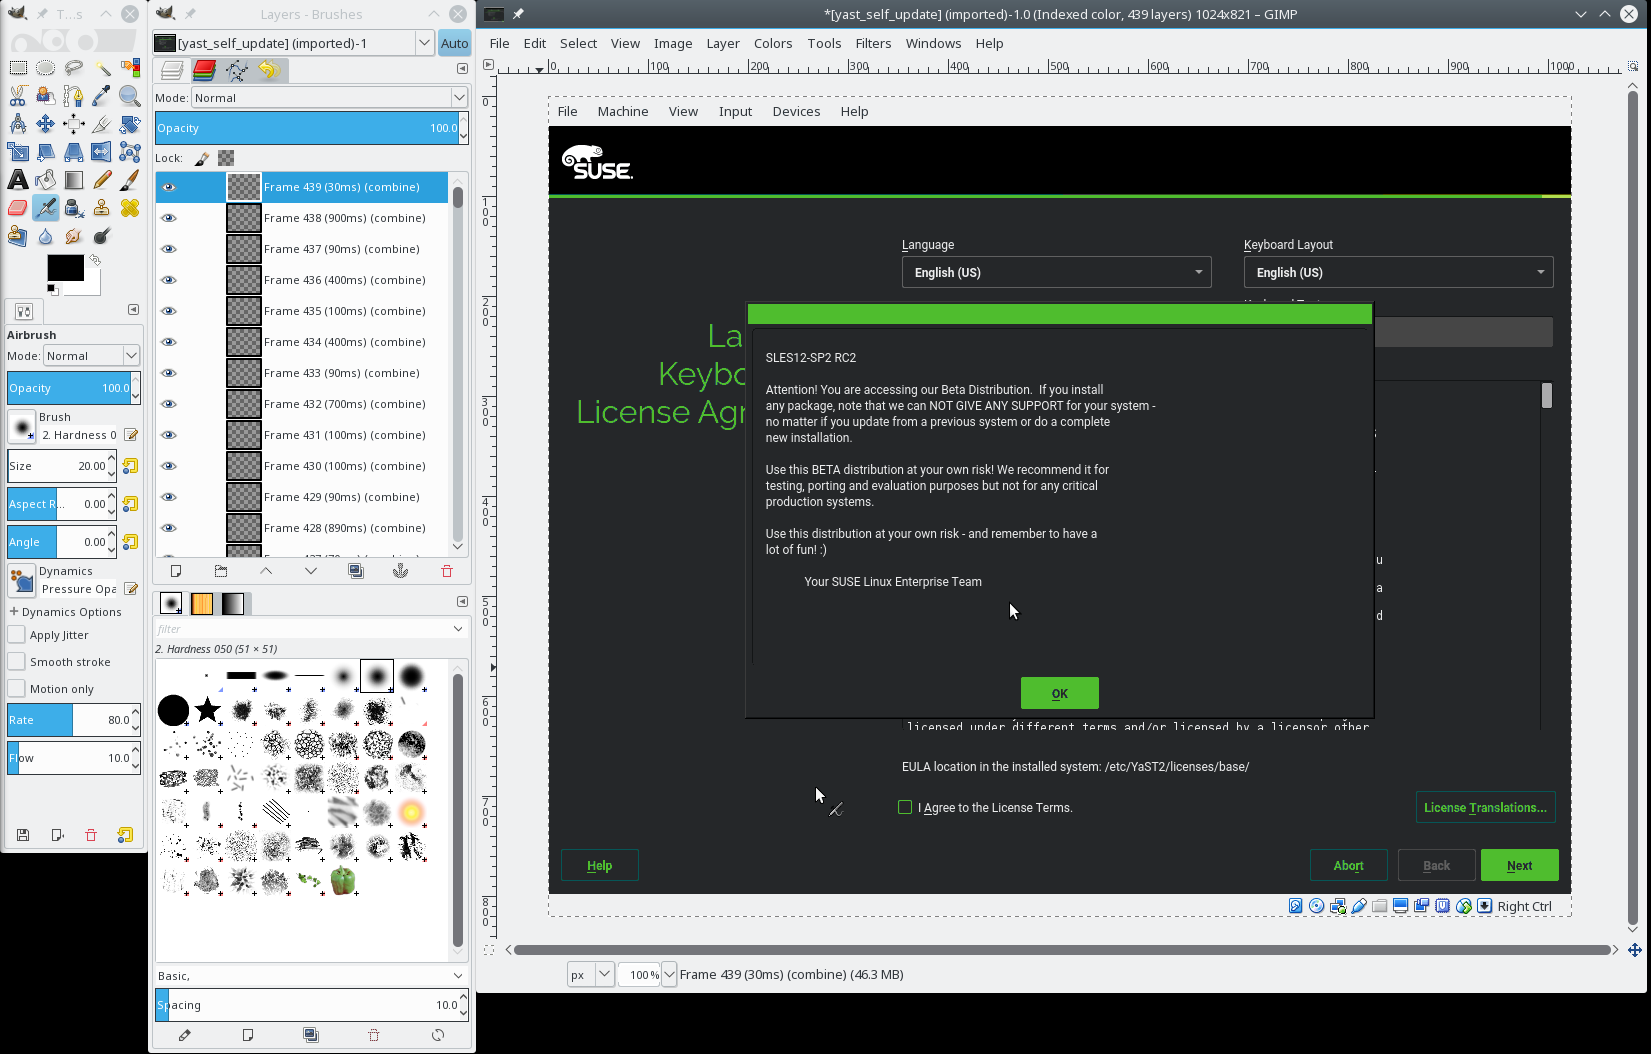
Gimp is designed for editing static images but with some workarounds it can edit
animations as well. Simply open your *.gif animation file created in the
recording session
in Gimp.
Every frame in the animation is loaded as a separate image layer. This looks a bit strange at first sight but I guess this was the only way how to add animation support into a static image editor.
The animation is played from the bottom layer to the top.
The Initial Step
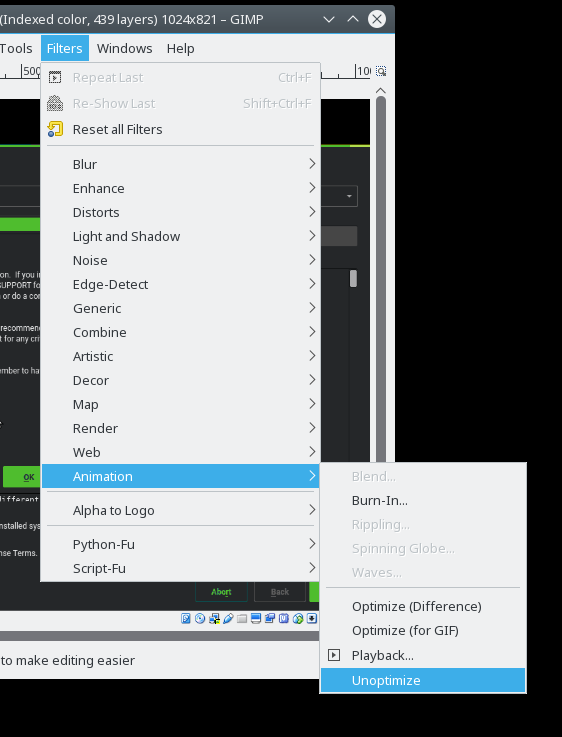
The very first step you should do after opening the animation image is to unoptimize it. To store the animation efficiently the GIF files usually store only the changes between the frames. Usually only very small part of the image changes and it does not make sense to repeat the unchanges parts in every frame and wasting space.
However, this makes editing more difficult as each frame (layer) only contains the changes, you cannot see what will be actually displayed on the screen and editing is almost impossible.
Fortunately Gimp can expand the diff frames to full images, simply use the Filters ➞ Animation ➞ Unoptimize menu. It will create a new image with full frames, you can close the original image now.
Displaying Separate Frames
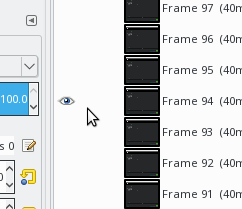
As already mentioned, each frame is loaded into a separate layer. If you want to see a frame you need to select only that frame otherwise the later frames (the layers above) will cover it.
Press Shift and click the eye icon in the layer window to display only that
frame.
Cutting the Animation
If you need to remove some frames at the begining or the end then simply remove the not needed layers from the image.
Select the layer and press the trash bin icon in the left bottom corner in the layer .
Changing the Timing
As you have probably already noticed the layer names contain special tags at
the end like (180ms)(replace). These tags specify the animation properties of
the frame.
The first value in the parenthesis defines how long is this frame displayed before displaying the next frame. The second value defines how the frame should be displayed.
Cropping the Image Area
If you need to crop the image area e.g. because you recorded a bit larger area you can simply select the area with the rectangle selection tool and use Image ➞ Crop to Selection to crop all layers.
Adding Empty Frame
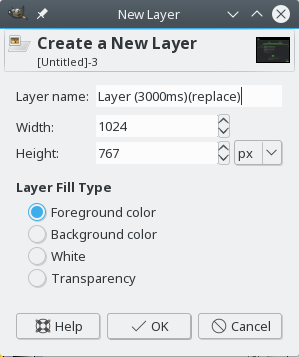
Select the top layer and select New Layer from the mouse context menu (right-click) or press the button in the left bottom corner of the layer window.
Do not forget to include the animation properties at the end of the layer name.
Preview
You can preview the current state using Filters ➞ Animation ➞ Playback menu. Exporting the final animation is not trivial so you should check the final animation before exporting it.
Exporting the Final Animation
At first you need to optimize the animation again. Use Filters ➞ Animation ➞ Optimize (GIF) menu to remove the repeating parts of images. This is basically the opposite process to the initial unoptimize step.
Then we can finally export the animation to a GIF file. Use File ➞
Export as … menu item, then write the target file name. Do not forget
to set the .gif suffix.
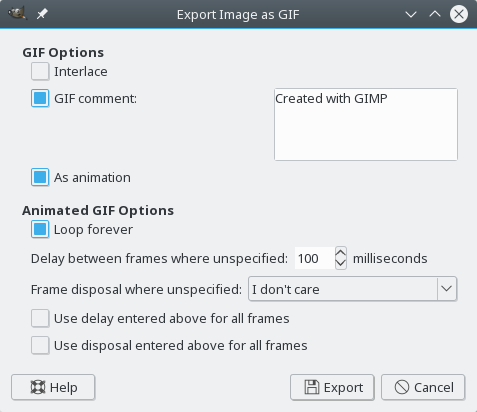
The most important step here is check the As animation option which is by default unchecked. Then press Export and that’s it!
The result could look like this:
Final Words
At the very end check the file size before uploading to web. The animation should be rather small, usually less than 500kB. Do not use several megabytes large files, that is probably too much (esp. for mobile devices).